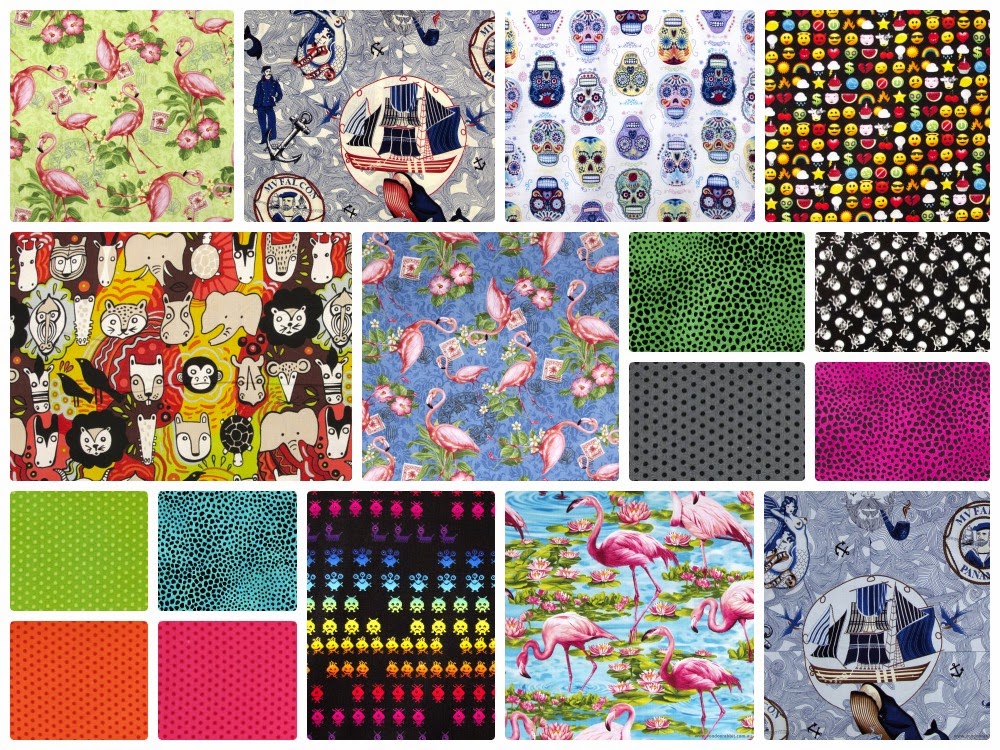
Wednesday, May 28, 2014

English Paper Pieced 200mm Hexagon Purse

I have recently discovered English Paper Piecing and it is addictive!! I now have to find ways of incorporating it into projects so that I don't end up with heaps of little bits of paper pieced fabric everywhere :)

Today I'm going to show you how to use paper pieced hexagons to make up a 200mm rectangular framed purse. I have used the 200mm purse pattern from You Sew Girl so this post does not include a pattern or full instructions for sewing up the purse.


Requirements:


If you have never tried English Paper Piecing I recommend that you watch this brilliant video tutorial by Sue Daley to get you started.  


Step 1: Cut the hexagons as follows:
12 x Blue (Mini Calaveras Turquoise by Alexander Henry

I used the 1-1/4" acrylic template to make fussy cutting the sugar skulls easier.


Step 2: Sew together the hexagons as per the diagram below. You will have to make two of these in total.

Pink = Pink Animal Skin | Grey = Black Skulls | Blue = Blue Skulls

Step 3: Once you have joined all of the hexagons for each side you can remove the papers and give the fabric a press. 

Step 4: Fuse the interfacing and then the wadding to the back of each of the pieced fabrics.

Step 5: Once the interfacing and wadding has been fused, allow it to cool for a few minutes and then cut out the purse front and back.


Step 6: Cut out the purse lining from the lining fabric.

Step 7: Sew up the purse as per the purse pattern instructions.

Step 8: Flaunt your fancy new purse to all of your friends :)


- Ky

Tuesday, May 27, 2014

Winner of our Boo! Designs Bat Dress Competition

The winner of our Boo! Design Bat Dress Competition is Elinor Drysdale. with her comment "I love option 3 Flamingo Fling - would be perfect for my granddaughter :)"

Congratulations Elinor, it looks like your granddaughter is going to get her Flamingo Dress :)


A big thank you to everyone who entered, and I hope you are all having fun sewing up your bat dresses :)

- Ky


Sunday, May 25, 2014

New In Store - 25 May 2014

This week we received more of the Witch Hazel collection from Riley Blake and new Echino from Kokka. Also if you missed out on the Zombie Apocalypse panel from the Stitches and Craft Show we have unexpectedly received an extra bolt, but be quick as this is the absolute last of it. 

We are excited to announce that we are now stocking Patchwork with Busy Fingers / Sue Daley Designs English paper piecing pre-cut shapes and templatessewing accessories and patterns.

Top Row

Middle Row

Bottom Row

Tuesday, May 20, 2014

Voodoo Rabbit x Boo! Designs Bat Dress Fabric Giveaway

**** This competition is now Closed ****
Winner is Elinor Drysdale
If you are on the look out for good quality, Australian designed Children's clothing patterns then you should definitely check out Boo! Designs.

Boo! Designs latest pattern is called the Bat Dress. Bat Dress? Yup, we're going to love that!


You can purchase the Bat Dress PDF pattern directly from here.

To celebrate the release of Kristie's latest pattern we teamed up with her to find the best six Voodoo Rabbit x Boo! Designs Bat Dress combos.


Option 1 - Kitty Cutie

Option 2 - Harajuku Geisha

Option 3 - Flamingo Fling

Option 4 - Pew Pew Pew

Option 5 - Gone Batty

Option 6 - Simply Gorjuss

Simply leave a comment below telling us which fabric combo you love the best and you could win enough of those fabrics* to make your very own Bat Dress.

Winner will be randomly drawn on Tuesday 27th May. Good luck!

- Ky and Cloud

(*if the fabric combination you choose is no longer available a similar fabric will be substituted)

Thursday, May 15, 2014

Pattern Test Drive - Red Velvet Dress by Cake Patterns

I really struggled to get my sewing mojo back after the Stitches and Craft Show at the end of March. Over the Easter break I thought it was high time I got may act together and make a Red Velvet Knit Dress. It is made from a stretch velvet dance fabric which I had picked up specially for this dress in November last year when I was in Melbourne. I don't know why but I've always wanted a velvet dress and the burgundy red colour is very lush.


Sizing and Adjustments
The Red Velvet Dress has 6 bodice sizes (from 30" up to 59" full bust) with 4 cup sizes for each. 

Since I never write down or remember them I always start by taking my measurements:
High Bust - 32"
Full Bust - 33"
Waist - 29.5"
Bodice Length - 12.5"

Based on my measurements I cut a 30" bodice with a C cup (I probably could have gone for a B cup but I don't like my clothes to be too tight). The finished length of this piece is marked on the pattern as being 10-1/8". I lengthened the bodice by 2" so that the bottom seam would sit in the correct spot under by bust line (on the underwire of my bra).


2" length added at the lengthen/shorten line marked on the bodice pattern piece. The same adjustment was made on the back piece as well.

The fit straight off the pattern trace was pretty good and only a few adjustments were required while sewing up the dress.
After basting the midriff to the bodice and the side seams I decided that I need to take the bodice/midriff seam up at the centre back by 1/2". I also skimmed in the side seam a little on the skirt to shape it to my hip/thighs.
I'm rather short (5'2") so I had to cut approx. 5" off the bottom of the skirt to get it to finish just above my knees with a 1" hem turnover.

Variations
You have a choice of a scissor or box pleat on the skirt. I'm not a big fan of the scissor pleat so I have gone with the box pleat option.

You can also add in a concealed ticket pocket on the waist seam but I decided to skip this option due to pure laziness :) and lack of an invisible zipper.


Red Velvet Dress teamed with a Cocoa Knit Shrug

Finishing
The stretch velvet can't be ironed onto directly so I made sure to only use a warm iron with a pressing cloth when seams had to be pressed.
I also didn't want any stitch lines visible on the outside of the dress as they would have stood out too much against the pile of the velvet. The hem and neck facing have been hand stitched in place using a dodgy blind hem stitch.


The image on the left shows the machine topstitching I did on the shoulder seam, as you can see it stands out quite strongly (almost looks like piping) but I thought I could get away with it on that section of the dress. The right image show the right and wrong side of the hem sewn up by hand using a blind hem stitch. The stitching is virtually invisible on the right side of the garment.

The finished dress is very comfortable to wear and teamed with a shrug/ cardigan and stockings it is going to be perfect for a Brisbane winter.

- Ky

Sunday, May 11, 2014

New in Store - May 11 2014

First up we just want to let you all know we will be attending a trade event with the Queensland Quilters on Tuesday 13th May so the Showroom will be closed for the day

This week we have a few new RileyBlake fabrics from the Unicorns and Rainbows, British Invasion and Witch Hazel ranges. We have a few of the old favourites back from Alexander Henry including the Wrangler Cowboys, because we know how much you all love them ;) We are happy to announce that we are now stocking the popular Sewline range of fabric pens, pencils and glues.


Right
Unicorns and Rainbows Main Pink by Riley Blake

If you missed out on our last round of knit sewing classes with Steph C of Cake Patterns then you should check out the new dates scheduled in July.


We are now stocking Sewline product and are offering10% off until Monday 12th May. They are available on our website here.
Till next week.
- Ky