

Tuesday, September 29, 2009
We've been featured in a Treasury!
Our cushions seem to be generating quite a bit of interest since we first listed them on Saturday night. Thanks so much to Nat at realisationcreations for including us in her 'red' treasury (along with some other very talented DUSTers).

Planning a Wedding - Part 2
So of course when my little sister announced that she was getting married and finally decided upon a date I offered to do the invitations. Luckily my little sister is fairly easy to design for, I came up with a few ideas and she picked the one below. The rose design is inspired by the Cross stitch design from her wedding guest book (read more about the guest book here). I saw an invitation design somewhere on a website that had a printed wax seal, so I decided we were going to go one better and use a real wax seal.
All of the stationary was printed double-sided on 200gsm Ivory canson card stock using an A3 Epson printer, my two sisters then had to cut them all out, attach the ribbon and wax seal. I was slightly worried that they were going to set fire to my kitchen but all the wax was melted without mishap.
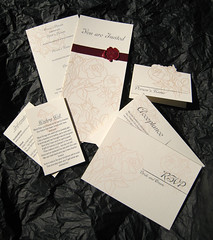
The full Stationary set included the invitations, RSVP card, Info/wishing well card and a place card.
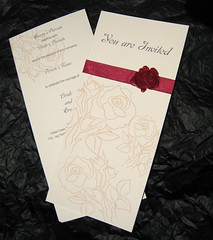
The invitations are DL size with a piece of 12mm ribbon and a wax seal on the front.
The invitations are DL size with a piece of 12mm ribbon and a wax seal on the front.
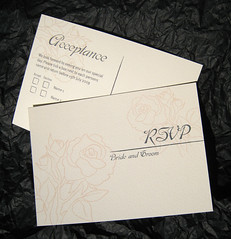
Each RSVP card included a stamp and the name of the invited persons so that when the cards were returned there was no chance of them not having any names on them. We had heard stories of people who had RSVP cards with space for people to write their names on and the cards being returned with no names added so that the bride had no idea of who it was from.
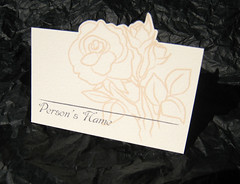
I had to cut out the place cards all by hand, luckily I am pretty quick with a scalpel.
All of the stamps used on the envelopes and the RSVP cards featured roses and were from the Australia Post "With Love" range. 
Monday, September 28, 2009
Just Like Bought Ones
I regularly go to general sewing workshops with a lady called Alison Wheeler, in these workshops you can work on any sewing project you choose and she teaches you some of the finer points of dressmaking and helps with any questions you may have. Yesterday I attended a lingerie making workshop at Alison's, the class was run by Lyn Larkin, Brisbane's lingerie sewing queen.
We learnt how to draft up a pattern and make a pair of knickers. I must admit I didn't really expect to get something wearable out of this class. I went along to learn the sewing techniques involved, so I was pleasantly surprised when I finished not one but two pairs of knickers that are comfortable and fit. So with some embarrassment here are pictures of my completed undies.
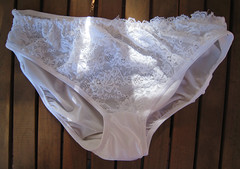
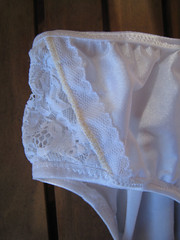
The first pair with stretch lace front and nylon spandex back. All edges are finished with fold over lingerie elastic except for the top of the lace which has scalloped edge lingerie elastic applied on the inside. The inner gusset is made from a cotton knit.
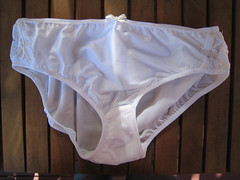
The second pair are almost completely made of nylon spandex except for small lace inserts on each side of the front. All edges have been finished with fold over lingerie elastic. The inner gusset is made from a cotton knit.
They started off as a basic generic granny pants pattern that was created from my own measurements and then I simply adjusted that pattern to suit my own tastes. White isn't really my colour but it is the only fabric that was available.
Both pairs cost less than $15 in materials which isn't bad considering you can pay that much and more for just one pair of commercially produced underpants. The only downside to the day was that my sewing machine absolutely refused to sew the nylon spandex and I had to use a loaner machine kindly provided by Alison.
In a few weeks I will attend part 2 of the workshop which will cover making bras.
Alison Wheeler is a member of the Australian Sewing guild (ASG) and is regularly featured in Australia Stitches Magazine. For more information on sewing lessons you can contact Alison Wheeler at sewinglady@optusnet.com.au
Lyn Larkin is also a member of the ASG and runs lingerie sewing classes with Alison every 6 months or so, she also runs workshops at various ASG neighbourhood groups.
New Michael Miller fabric shipment
There is a heap of new Michael Miller fabrics waiting at Ky's place for photographs & listing!
We have now received two co-ordinating fabrics for the Amped Up - Mud already listed on etsy and these tattoo inspired designs.


We have now received two co-ordinating fabrics for the Amped Up - Mud already listed on etsy and these tattoo inspired designs.


We also have more cherries, instructions on how to get a husband, green apples & a fifties kitchen in store.
Friday, September 25, 2009
I'm not the only crafty one...
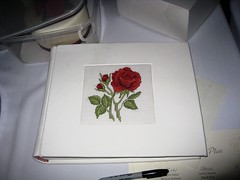
Sam-Sam's little sister, Rae, got married about a month ago. She asked Sam-Sam and Ky to make her a special guest book for her wedding present. The cross-stitched rose was sewn by Ky but the rest of the book was made by hand by Sam-Sam.
The leather was imported specially from South America. White leather is really hard to find in archival quality and it's super expensive. All the pages were folded individually, then sewn together. There is also archival tissue paper in between each page. The book was far too precious to write in directly - the guest had to put their message on a card to be added later. Photos from the table cameras will also go in there. Because of this, Sam-Sam had to sew in spacers so that when Rae & Joel paste in photos and guest message cards the album will expand properly. It truly is a beautiful thing. Rae & Joel love it - almost as much as they love each other!
The wedding was quite a family, handmade affair. Ky & I made faux fur wraps, Ky screenprinted hen's night shirts, Sam-Sam made the book. Ky designed & printed out all the invitations as well. I made the brides' jewellery. Ky also made the veil.
Ky is planning to put up pics of all the stuff she made for the wedding on her blog, Not Dark Enough. The hens' night shirts are already there :)
Thursday, September 24, 2009
Tea Ceremony Geisha - Complete
I have finally finished off the Tea Ceremony Geisha Applique. I ended up having to quilt the background as the wadding I bought really quickly was way too thick and needed to be held in place. All I can say is Yay for the invent of the walking foot. I decided upon a crisscrossing pattern in the background as it is similar to a sashiko pattern that I use regularly. I did a running stitch on the machine as I didn't have the time to do it all by hand as I would with real sashiko.
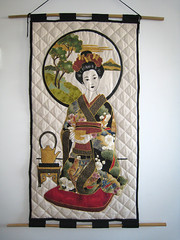
The actual satin stitching around the fabric pieces turned out to be easier than I thought it would. I must admit that the thought of satin stitching the trees in the circle had me avoiding this project more than once. Yay for the invent of the open toe applique foot. I satin stitches all around the Geisha and the teapot using a beading foot (I think it was) and then decided I needed something better for the smaller details. A very good decision, I think stitching the smaller details ended up being a little easier than some of the larger areas. All in all I am quite happy with my efforts on this project and hope the recipient feels the same when I give it to her tomorrow.
Voodoo Rabbit is having a sale!
The DUST team is having a huge weekend sale on Etsy!
Visit our store for 5% off your total order (excluding shipping) this weekend 26-27 September. Just add the words "WEEKEND DEALS" to your notes to seller on checkout to receive your discount :D
This offer includes our Gingham Invaded fabric and our already marked down Vintage fabrics and buttons. Stock is limited so don't miss out!
Etsy Weekend Deals - SALE!
The DUST team is having a huge weekend sale on Etsy!
Visit our store for 5% off your total order (excluding shipping) this weekend 26-27 September. Just add the words "WEEKEND DEALS" to your notes to seller on checkout to receive your discount :D
This offer includes our Gingham Invaded fabric and our already marked down Vintage fabrics. Stock is limited so don't miss out!
Tuesday, September 22, 2009
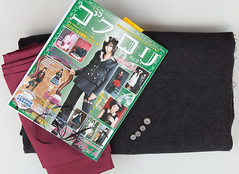
Gosu Rori Jacket
While in Japan a few years ago I came across a series of magazines called Gosu Rori (Goth and Lolita Sewing), there are some very cool goth clothing patterns in these magazines. I always look for the latest issue whenever I get to go into a store that sells Japanese magazines.
So I was quite taken with this jacket and decided that I had to make it.
So I was quite taken with this jacket and decided that I had to make it.
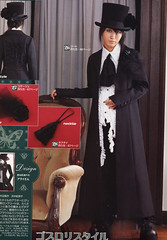
I have adjusted the pattern slightly in that I am going to line it and have added in a back split so that I can walk when it is buttoned up.
I found the most awesome black jaquard cotton fabric in Bargain Box fabrics, as well as some buttons and burgundy lining. Though we have just gotten in some really cool fancy linings for the shop so I may use one of those instead.
So far I have drafted out the pattern and done a quick pattern fit. The outer jacket is cut out and almost half assembled. With any luck I will have it finished in a few weeks.
I must offer thanks to Batty Chan and her "Understanding the Patterns in Gosu Rori" PDF worksheet, which was an enormous help and time savers for translating some of the Japanese text.
I must offer thanks to Batty Chan and her "Understanding the Patterns in Gosu Rori" PDF worksheet, which was an enormous help and time savers for translating some of the Japanese text.
Lots of new listings on Etsy
We've just listed a heap of goodies on Etsy. Ky's original Gingham Invaded designs are up (by the metre & also fat quarters) and we've also listed some fancy lining fabrics.
Monkey see, Monkey want
I am home with a cold & waiting for doctor's appointment. Should be listing stuff on etsy or doing the book work but I've decided to go virtual shopping instead.
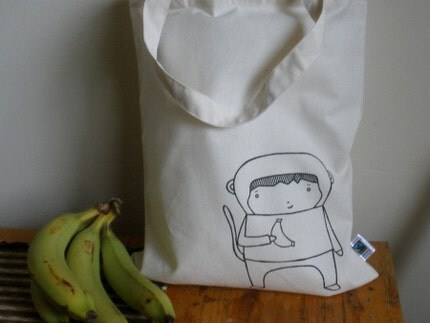
I found all of these items using the search tags "DUST team, Monkey, Banana" :)

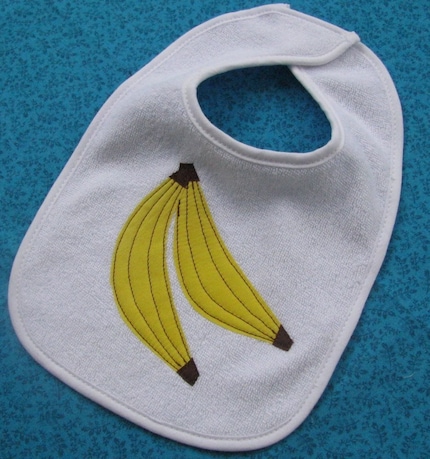
Top Banana Bib by NeverEver
I found all of these items using the search tags "DUST team, Monkey, Banana" :)
Monkey - Screenprinted Organic Cotton Tote Bag by pocketcarnival
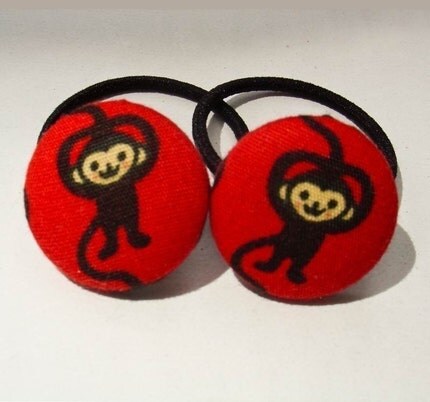
Adele - Fun set of ponytail holders by Please Eloise
Fun Felt Foods Wool Felt Banana with Removeable Skin by mclean2612
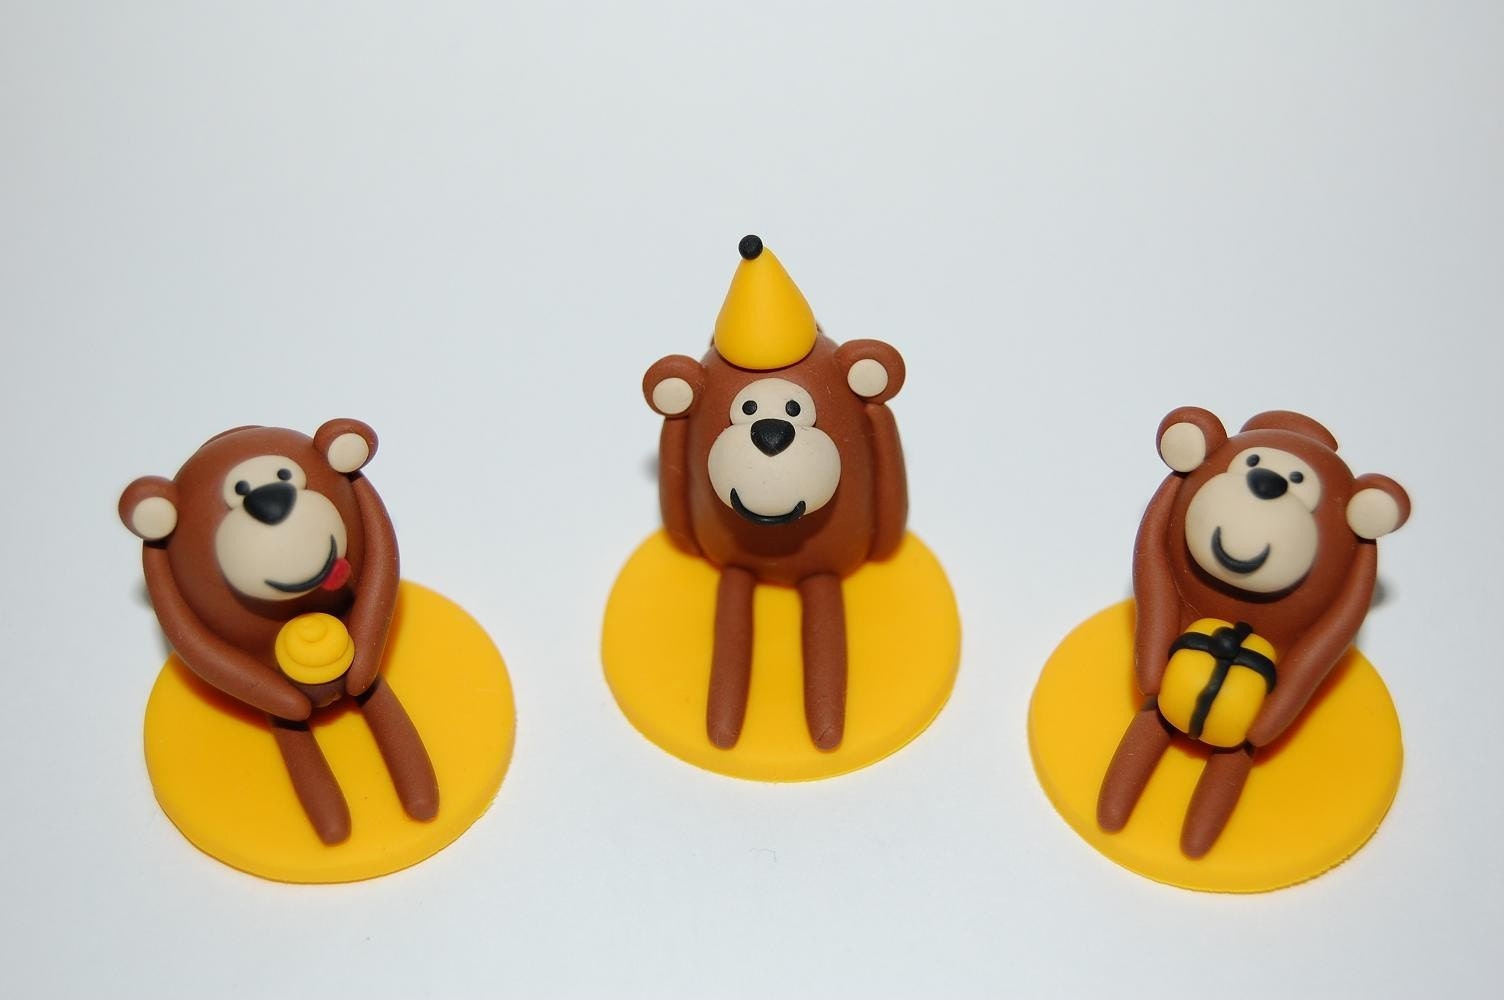
Custom Monkey Birthday Cake Toppers by RaspberryPink
Top Banana Bib by NeverEver
Monday, September 21, 2009
Hearts and Bows Trapunto
In early May of this year Cloud and I attended the Brisbane Stitches and Craft show, which I must admit was a bit of a disappointment to us both. One of the good things we found was Annie London's Designer Stitches stall. Annie London designs and sells shadow and French Trapunto kits and patterns.
It just so happens that the activity for our next Bulimba Belles meeting was Trapunto so we just had to buy a kit each to take with us. All of the designs were beautiful and making a decision on which one to buy was difficult but we both decided to go traditional and choose a French Trapunto kit each. I chose the Hearts and Bows design and I think Cloud picked the French Tulips. In hindsight we probably should have chosen simpler designs for out first foray into Trapunto as these ones were quite large and detailed.
It just so happens that the activity for our next Bulimba Belles meeting was Trapunto so we just had to buy a kit each to take with us. All of the designs were beautiful and making a decision on which one to buy was difficult but we both decided to go traditional and choose a French Trapunto kit each. I chose the Hearts and Bows design and I think Cloud picked the French Tulips. In hindsight we probably should have chosen simpler designs for out first foray into Trapunto as these ones were quite large and detailed.
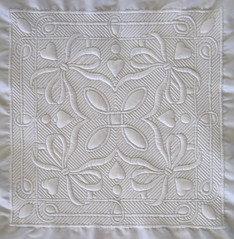
Finally, 4 months later I have finished mine, the final piece is 34cm square. I'm quite pleased with the finished result and I believe Polymonkey is planning on getting it framed for me.
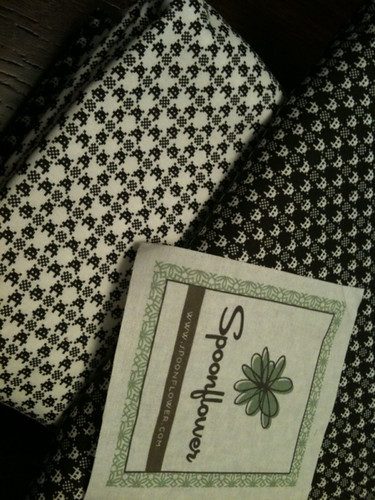
Spoonflower - Fabric of the Week Competition Entry

I designed SpideryWeb for the latest Spoonflower Fabric of the Week contest which was a Halloween theme!
There are some AMAZING designs this round! To vote, go to http://blog.spoonflower.com/fabric-of-the-week-contest-1.html
Voodoo Rabbit is now on Facebook
We've taken another leap into cyberland today by setting up our Facebook Fan page. Next stop - Twitter!
Wednesday, September 16, 2009
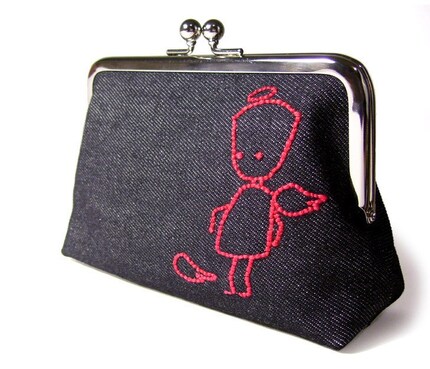
Emo Sang Sangs
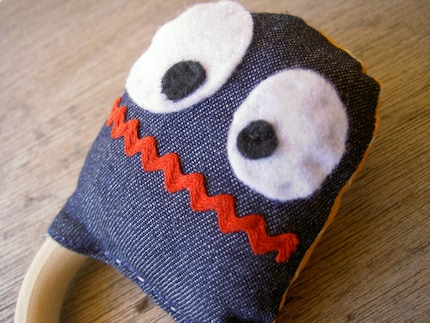
Here's some more of my crazy softies sewing! I made these guys for a 'decorative stitches' challenge at my neighbourhood group meeting of the Australian Sewing Guild (ASG). At 33, I am one of the youngest members of our group so you can imagine the reaction these little toys got!
 This one is my favourite.
I appliqued his little heart on and then couched some embroidery thread over the top to make his ribs. He's only about 20cm big and he lives at Ky's house with my Evil Bunny and the other doll below.
 On his back I did more couching to give him a spine and more ribs. I use this pic for my profile image on Zombie Hare (my other blog) - that's how much I love him!

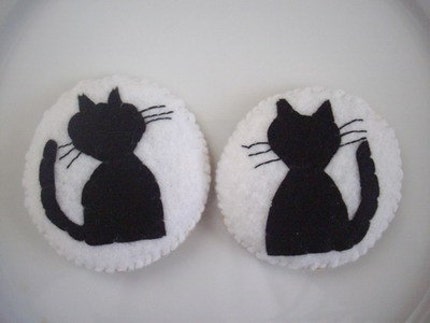
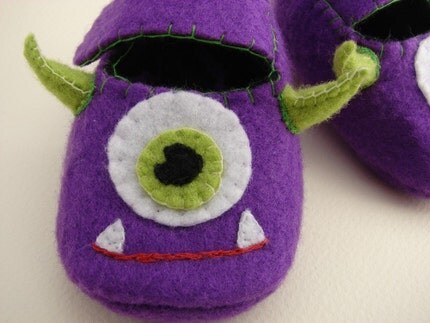
This is the sister to the doll above. She has horns! Like her brother she doesn't have a name - leave a comment if you have suggestions.
Both dolls are a variation of the Sang Sang pattern by Melly & Me. I made them using 100% cotton poplin, linen for the face and embroidery thread for the face details.
 This one is my favourite.
I appliqued his little heart on and then couched some embroidery thread over the top to make his ribs. He's only about 20cm big and he lives at Ky's house with my Evil Bunny and the other doll below.
 On his back I did more couching to give him a spine and more ribs. I use this pic for my profile image on Zombie Hare (my other blog) - that's how much I love him!
This is the sister to the doll above. She has horns! Like her brother she doesn't have a name - leave a comment if you have suggestions.
Both dolls are a variation of the Sang Sang pattern by Melly & Me. I made them using 100% cotton poplin, linen for the face and embroidery thread for the face details.
Tuesday, September 15, 2009
Gingam Invaded - Spoonflower Order Update
Our Spoonflower order arrived! Ky & I have been making some space invader cushions from it already - we hope to have them listed on etsy by the weekend.
Monday, September 14, 2009
Damn etsy maintenance!
Our Spoonflower order arrived today and Etsy is closed for maintenance! NOOOOOOOOOOOOOOO!
Sunday, September 13, 2009
Etsy's Dark Side Street Team: Tutorial: Beaded Spider by Room3Designs
I think I need to make some of these for Ky...

Etsy's Dark Side Street Team: Tutorial: Beaded Spider by Room3Designs

Etsy's Dark Side Street Team: Tutorial: Beaded Spider by Room3Designs
Friday, September 11, 2009


Halloween jewellery by DUSTers on etsy
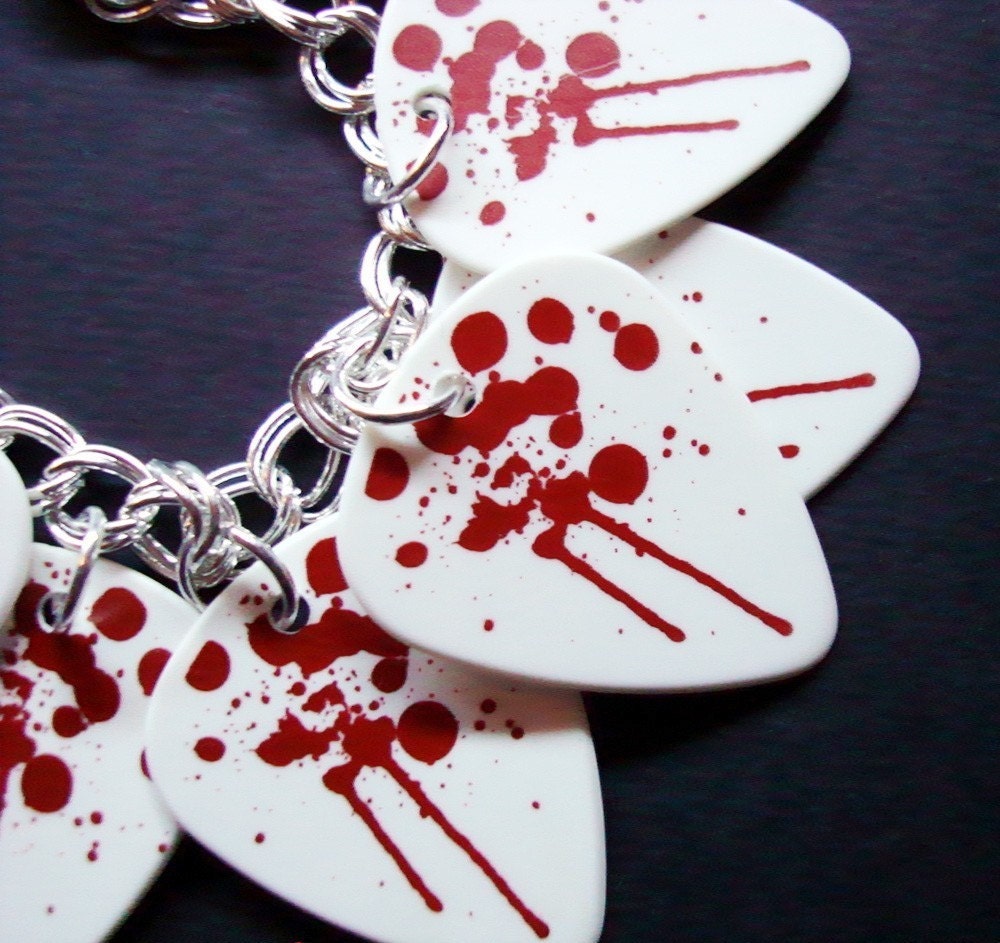 Innocent Bloodsplatter Guitar Pick Bracelet by LushPunk
 This bracelet is hardcore baby! Nothing more to say - this bracelet just ROCKS!
 Amethyst Obsession Earrings by Angelene
Put on your hat, lace up your corset, button up your boots and go out searching for your vampire love...
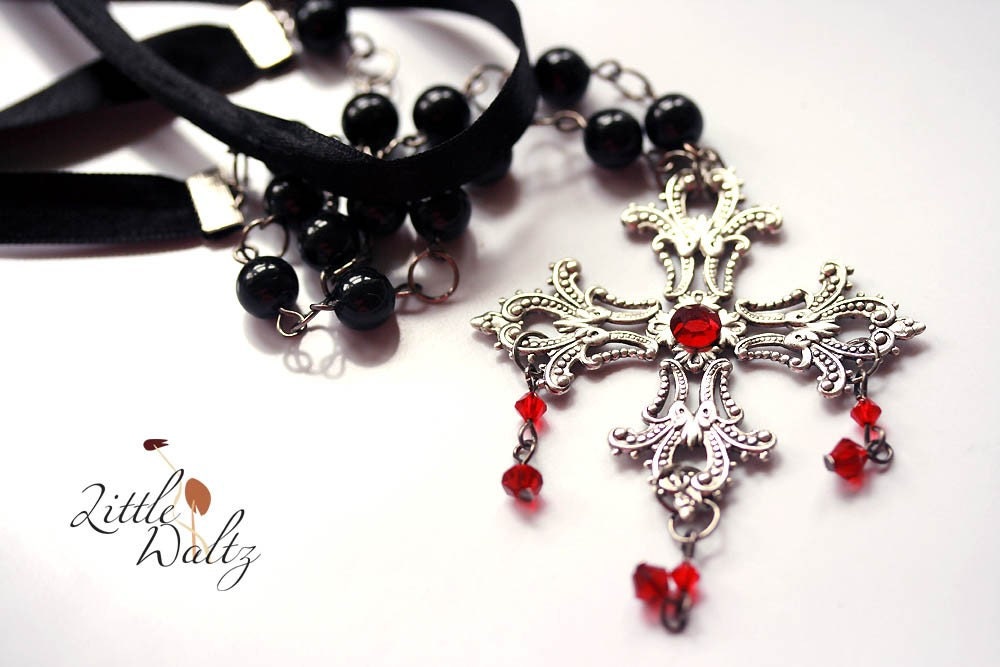 Dripping Red Necklace by littlewaltz
Goth! Vampire bites! Swooning! Love it.
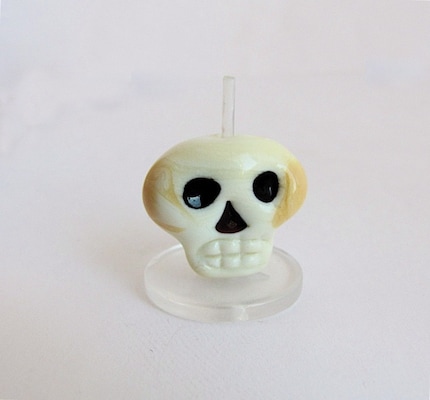 Ivory Halloween Glass Lampwork Skull Bead by girlfriday1962
Ok so it's not quite jewellery yet. But these little beads are totemo kawaii desu ne! The vertical hole makes it perfect for a phone dangle, key chain or lariat. Sweet!
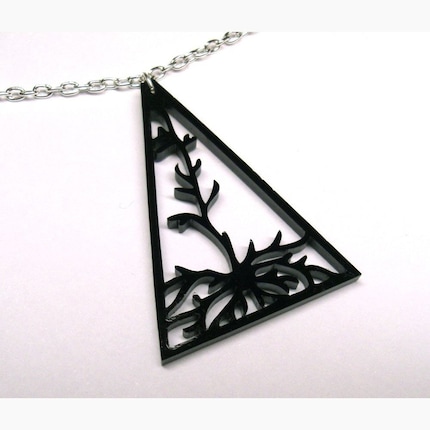 Pyramidal Neuron Necklace by Morphologica
 I love that these are so subtle with their geeky human bodypart references. Who would have thought that little bits of a brain could look so sexy?
Our vintage fabric has been featured
Nothing like a little love & free advertising! Jennette at Boutique Stitches has featured our vintage fabrics on her blog today - click the link below to have a looksee.
Boutique Stitches: Ok may the truth be known, I am jennette I am addicted to fabric....And now i love vintage fabric to!
Boutique Stitches: Ok may the truth be known, I am jennette I am addicted to fabric....And now i love vintage fabric to!
Thursday, September 10, 2009
Diner Shirt
As you can probably guess, I'm "a bit goth" and quite like black. I also like the 50's style bowling / diner shirts made from Simplicity pattern 3847. The pattern is actually for a costume and needed major alterations to fit well. If you make it up as per the pattern it turns out a bit shapeless and sack like. To give it more shape I have added darts to the front and back, and splits at the bottom of the side seams.
The pink fabric is called "Pretty in Punk" and the black fabric is broadcloth.
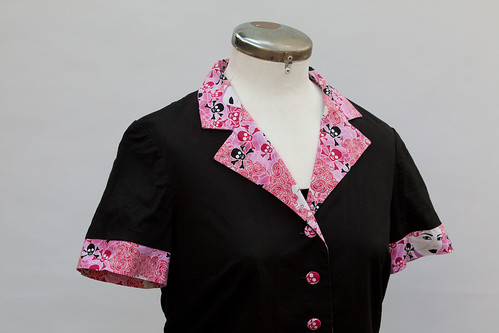
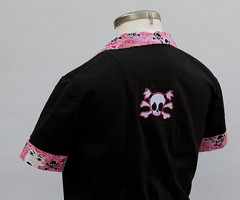
The patch on the back of the shirt was from a market stall in Fortitude Valley.
The pink fabric is called "Pretty in Punk" and the black fabric is broadcloth.
The patch on the back of the shirt was from a market stall in Fortitude Valley.
More images can be found here.
Thanks to polymonkey for taking the pics.
Wednesday, September 9, 2009
Flogger :P
The DUSTers have given me a great blog idea to flog - Wishlist Wednesday!
So.. I'm going to do my first one up for next week. Theme is Halloween - if we had it here in Australia what would you wish for?
Post a comment with a link to your items if you want a chance to be included.
So.. I'm going to do my first one up for next week. Theme is Halloween - if we had it here in Australia what would you wish for?
Post a comment with a link to your items if you want a chance to be included.
Tuesday, September 8, 2009
Gingham Invaded - Spoonflower Order
Ky has ordered the gingham invaded fabrics in black & white. They are currently on their way to us & will be listed on etsy as soon as they arrive!


Ky has been busy creating more designs for the store and they are more goth than geek this time!
Ky has been busy creating more designs for the store and they are more goth than geek this time!
Monday, September 7, 2009
We've joined the DUST team!
There's an amazing community of crafters in Australia. Voodoorabbit has joined up with DUST - the Down Under Street Team on etsy. Buy local and check them out:
http://dustteam.com/blog/
http://dustteam.com/
http://dustteam.com/blog/
http://dustteam.com/
Thursday, September 3, 2009
Goth Corset & Gored Skirt with Gorets
Cloud & I are heading back to Japan in February next year - we're aiming to bring back a heap of stock and find some suppliers over there. Expect to see lots of recycled vintage kimono fabric. A piece from the last batch I bought was used for the front panels on this corset, the rest of the fabric I found at Spotlight.

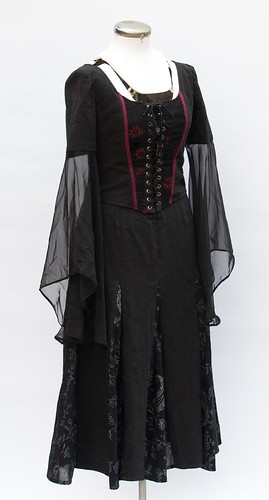
The corset top was made from Vogue Pattern 7733. If I ever make it again I think I will have to adjust it a bit as it is quite tight around the armholes and across the back. Also I think a zipper for ease of getting in and out of it may be a good idea.
I seem to have misplaced the skirt pattern and have no idea what it was. I do know that it originally had a waistband that I removed because I hate waistbands, I'm quite short and they don't really suit me. I made up a facing for it instead.
More photos can be found here.
Photos by polymonkey
Wednesday, September 2, 2009
Tea Ceremony Geisha - Work in Progress Update 1

I have begun work on the Tea Ceremony Geisha Appliqué kit that I picked up the other week. I have attached all of the fabric to the panel using Appli-kay Wonder and it is now ready to have all of the raw edges satin stitched. I must say that this kit is a bit more fiddly than the Cherry Blossom Geisha that I have previously completed. There is a lot of detail in the background that I am finding a bit daunting and I must admit I find myself procrastinating a little on this project. Hopefully with a little patience and perseverance I will be able to finish this project and move on in a week or two.
Subscribe to:
Posts (Atom)