Friday, August 30, 2013

Fabric Friday - Crazy Cat Ladies

So apparently you are either a cat or a dog person. Here at Voodoo Rabbit we are definitely cat people and although we only have two live cats between us (both Cloud's, I'm allergic) we seem to be making up our crazy cat lady status by collecting cat fabric. In the last two weeks we have had 6 new cat fabrics arrive !!

Today for Fabric Friday we thought we would feature some of our favourite cat fabric (that's right there are actually more :)

Top Row:

Middle Row:

Bottom Row:

So are you a cat or a dog person?
- Ky

Friday, August 23, 2013

Fabric Friday - Holiday Travel Fabric

It seems that everyone I know is on holidays or is about to go on holidays and at least one of them will be in Paris for a day. *sigh* Since I'm not going to be travelling anytime soon I'll have to console myself with some travel themed fabric.
Top Row

Middle Row

Bottom Row


In keeping with the travel theme we have finally cut out our You Sew Girl Beauty Case sample. When the camera fabric arrived last week I just knew that I had to use it on this project :)


Bon Voyage till next week.
- Ky

Tuesday, August 20, 2013

How to Make a Kawaii Fabric Bow

I've always been a bit of a bow bunny - I love them on hair clips. These ones are particularly kawaii because they have little pointy ends on them!

This is my first photo tutorial - let me know how I go!


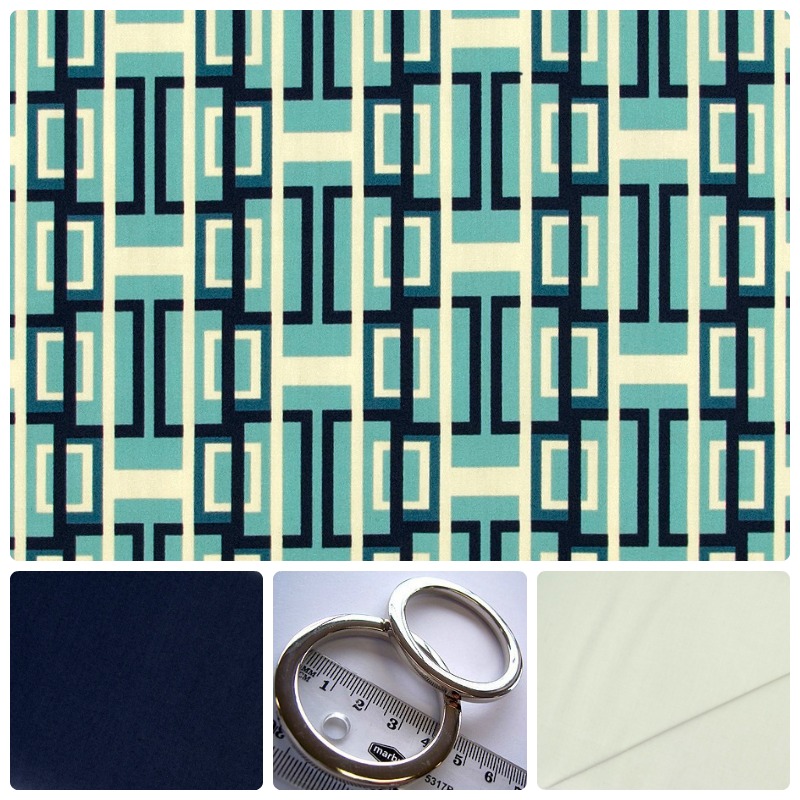
To make a Kawaii Fabric Bow you will need:
  • Scraps of fabric (small prints work best)
  • Scissors or rotary cutter with mat
  • Tape Measure or Ruler
  • Matching thread
  • Sewing machine
  • Iron
  • Hand sewing needle
  • Chopstick, paintbrush or point turner
Note all seams are 1/4" (5mm) unless specified.

Step 1:
Cut out two rectangles of fabric. I measured and ruled the lines on the wrong side of my fabric. You can use scissors or a rotary cutter & mat to cut your fabric out.


MAIN BOW FABRIC- 13" wide x 4" high (33cm x 10cm), the longest length will run left to right on your finished bow so if you want your fabric pattern to run in a particular direction, keep this in mind when you cut. I didn't mind which direction my Tomatoes faced on this part.

CENTRE TIE FABRIC - 2" wide x 3-1/2"wide (5cm x 9cm), the longest length will run up and down on the finished bow so again, keep this in mind when you cut. I made sure that my Tomatoes in the centre of my bow were right side up.

Step 2:
Fold MAIN BOW FABRIC in half, right sides together and sew along the long edge. Leave a gap in the middle (approx 4"/10cm long), so that you can turn your bow right side out later. Don't sew the ends yet!


Position the seam so that it is centred and iron it flat. Press open the seam.


Step 3:
Measure 1" (2.5cm) up the seam line and rule a triangle out to the corners. Sew along the lines. Repeat for the other end. This makes the pointy ends on your bow!


Step 4:
Trim the excess fabric away from the triangle you just sewed.  Be careful not to snip any of the stitching. Try to get in close to the point. The more fabric you can trim away, the less bulky your bow points will be.

Turn your bow right side out through the turning gap. Gently push out the points using a chopstick, paintbrush or point turner. Press flat. You don't need to sew up the turning gap.


Step 5:
Fold the CENTRE TIE FABRIC in half with right sides together and sew along the long edge. Turn right sides out - you can use a chopstick, paint brush or any thin, blunt object to help with this. Position the seam to the centre of the tie and press flat with an iron. Keep this piece aside until Step 7.

Step 6:
Measure and mark the middle of the bow with a pin. Use the pin as a guide to "eyeball" the size of your bow loops. You want your loops to meet at the back of the bow but not cover over the pointed ends.

There are no set measurements here - go with what you like. The Sushi Bow I made has longer pointy ends so you can see more of the fabric pattern. I preferred my Tomato Bow a bit more stumpy looking.


Hand sew the back loops together so they sit flat. This stitching isn't seen so you don't need to be too precious about how neat it is. I used a simple slip stitch.


Step 7:
Position the CENTRE TIE around the middle of the bow. Pull it in a bit to help shape the bow. Again, play around with it until you like how it looks. Tuck the raw edges under at the back and hand sew in place. I used slip stitch here too.

I didn't sew the CENTRE TIE to the MAIN BOW FABRIC so that it creates a loop that can be moved around a bit & also is a bit more versatile for attaching the bow to hair accessories.

Step 8:
Attach the bow to a hair clip, alice band, elastic to wear in your hair. You could also use it to embellish a shirt, dress or even a bag.

Kawaii Bow - Achievement Unlocked! I flounced around in my Bunny PJs and my Tomato Bow for at least an hour before I went to bed after making it :)


Links to the fabrics we used in this tutorial:
Tiny Prints Collection Tomato White by Lecien
Bento Box Happy Sushi Multi by Robert Kaufman

Original pattern was found on Pinterest and is from here.

- Cloud

Sunday, August 18, 2013

New Fabric and Bag Hardware in Store this Week - August 18

This week we have two new fabric ranges to introduce. The first is Passport by Northcott which features travel themed fabrics including a Paris Map and Vintage Cameras. We have a our first jersey knit fabrics from Riley Blake in half inch and one inch stripe, these are perfect for sewing Cake Patterns Tiramisu dresses (patterns coming to Voodoo Rabbit soon). We also have some 8mm and 12mm clip hooks for making detachable purse straps.
Top Row
Middle Row
Bottom Row

See you all next week :)
- Ky and Cloud

Friday, August 16, 2013

Fabric Friday - Mod Bag Dilemma

The October Craft and Quilt Fair is fast approaching and I need to start making bag samples toot sweet. I asked Cloud for a fabric combination for the Mod bag and she gave me three. So I ask you dear bunny readers, which fabrics should I use?

Here is a pic of the Mod Bag, it is a You Sew Girl Pattern and has a bit of a retro feel so Cloud has chosen some appropriately retro inspired prints from our range.

Option 1:

Option 2:

Option 3:

I think that all options would look best with Silver hardware. I am leaning towards option 2 but I'd love to know what you think. Don't take too long, I have to cut this out on Saturday :)

- Ky

Sunday, August 11, 2013

New Fabric in Store this Week - August 11

This week we have a new range called I Am Ninja from Robert Kaufman which features the cutest little ninja warriors you ever did see. We have also added to our needlework section with some plain white cotton tea towels and 1/2 aprons for you to embroider. These would make great gifts and Christmas is fast approaching :)
Top
Middle
Bottom

Speaking of needlework, there was a bit of a hiccup with the DMC thread listings last weekend but this is all fixed and all of the colours should now be available. Till next week.

- Ky and Cloud

Friday, August 9, 2013

Fabric Friday - Cosmic Zoo Organic Cotton

Cosmic Zoo Mice is an organic cotton from Kokka, Japan. It is a beautiful soft fabric and the print is super cute but a bit quirky. We've teamed it here with soft greys, yellows and dark blue and red. 
Top Row
Middle Row
Bottom Row

Cosmic Zoo Mice is on my ever expanding "I really must make a dress out of this fabric" list. I'm thinking of a Cosmic Zoo dress with kimono style sleeves with red or blue trim. What do these fabrics inspire you to make?
- Ky

Wednesday, August 7, 2013

Alexander Henry Mirage Carry All Bag

This bag isn't called the Carry All for nothing, it is HUGE. The finished bag measures 38cm x 34cm x 9cm (15"x13-1/2"x3-1/2") and seriously you could fit the kitchen sink in this thing :)


The Carry All has a lot of options for pockets and closures. I went all out on my bag, here is the list of the features I included:
  • Outside Pocket with magnetic closure
  • O-rings on strap
  • Flap with piping and o-ring
  • Zippered top
  • Internal compartment pocket
  • Internal zippered pocket
  • Internal divider pocket
Zippered Top
The internal compartment pocket sits behind the Internal Divider Pocket and both pockets are closed with a button and loop.
Internal Divider Pocket
The Zippered Pocket is meant to be 18cm wide but I couldn't find an 18cm zipper in my stash for the life of me. I just cut 3cm off the pocket and made it 15xm wide to accommodate the zipper I did have :)
Internal Zippered Pocket
The Outside Pocket is meant to be closed with a sew in magnetic snap but I didn't have any so I used the non sew in type without any problems at all. I used these instructions to make sure that the back of the snap isn't going to cause any damage to my bag. I also fussy cut the pocket so that when it is closed the pattern on the front pocket matches the pattern on the front of the bag seamlessly.
Outside Pocket
After I piped around the edge of the flap I kind of wished I had piped the top of the outside pocket as well. I was also going to use a magnetic catch on flap instead of the O-ring but one magnetic catch on the front pocket seemed like enough so I went with the ring instead. I think that the antique brass colour goes quite nicely with this print.
Flap Closure, and check out that fussy cutting on the front pocket :)
Notes on Interfacing
When using quilting cotton to make You Sew Girl bags I usually always fuse a layer of Medium Woven Fusible interfacing and a layer of H640 wadding to the outer fabric to give the bag structure, unless you want a floppy bag in which case just use interfacing. I also used my new (second hand) Elna press to fuse all of the interfacing and wadding. This definitely fused everything more evenly than using a standard iron.
In the Internal divider pocket I used Medium-heavy fusible woven interfacing instead of Peltex 72F. The Peltex would have given a more sturdy divider but it would have made turning out the bag and top-stitching the lining gusset a lot harder than I was prepared to deal with.
Use a walking foot to help sew bulky layers of wadding.
As you can imagine 2 layers of wadding plus 2 layers of medium interfacing plus 2 layers of fabric can get very bulky. This is when having a walking foot is a big bonus, I find that it helps the machine pull the fabric though a bit more evenly.

Difficulty Rating
This bag is not for beginners, I would recommend having a few You Sew Girl bags under your belt before attempting this one. The hardest part is top-stitching the outer bag gusset as the bag can get very bulky and tricky to get under the presser foot evenly, especially if you have used wadding to add extra structure. There are also lots of pieces and this can be a little bit daunting. I would recommend going through the instruction book and highlighting all of the optional extras that you are planning on including so that you don't miss anything.

If you are wishing to recreate this bag this is everything that I used:
Happy Sewing
- Ky

Saturday, August 3, 2013

New Fabric and Haberdashery in Store this Week - August 3

This week we received some more laminated cotton fabrics from Alexander Henry. We have these designs at the special price of $30/m until the 10th August after which time they will increase to $35/m.


We have also uploaded all of the DMC threads onto the website, there is a separate listing for each colour so if you are after a particular colour you can type it into the search bar at the top of the webpage and find it that way easily. 

For most of July we were working towards shuffling around the showroom to make more room for stock. WE have moved our office and sewing table into the small back room and opened up the area where the office used to be.
All of our You Sew Girl bag samples are now displayed nicely up on the back wall (at least they will be once I buy more hooks, we have a lot of bags :). Our rolls of fabric are no long bunched up near the front door. We have a nice open area to set up for classes and we don't have to hide the pattern racks away in the back room anymore. Feedback on the new space has been very positive and the showroom feels heap bigger and brighter.

That's all for this week, next week we will be prepping for Rockabilly Riot which is at the Brisbane Convention and Exhibition Centre on the 10th and 11th. The showroom will still be open during this event but please be aware that some of the stock may not be available so please call ahead if you are after something in particular.

Catch you later bunnies
- Ky

Friday, August 2, 2013

Fabric Friday - Alexander Henry's Matisse

The Matisse range by Alexander Henry is inspired by the artwork of Henri Matisse.
Top Row
Middle Row
Bottom Row

Left to right - Young Girl with a Yellow SofaInterior with an Etruscan VaseMusic
I don't know if there was one painting in particular that inspired this collection but these three painting, which were painted by Matisse between 1919-1942, have a similar feel to the main Vie En Rose print.


Vie En Rose is just calling out to be made into a bag, perhaps a Carry All or a Hobo bag to really do the print justice. Teamed with the yellow Pine Stickers or the light green Outfoxed Stripe for the lining. Hmm I need to make a hobo sample...
Here is our Poppet Purse made from the Amelie Rose print with additional embroidery over one of the roses. Looks quite classy I think.

I really think that I may need to make up that hobo bag very soon :)
- Ky