Showing posts with label Independent pattern. Show all posts

Wednesday, March 5, 2014

Serendipity Studios The Madeline Maxi Dress Pattern Test Drive

In between all of the preparation for the Brisbane Stitches and Craft Fair as well as the day to day running of Voodoo Rabbit I have managed to make myself another dress. I have been wanting a maxi dress for a while now and have these fabrics in my stash for a few year now. I purchased them specially to make a maxi dress out. When we ordered in the Madeline Maxi Dress pattern from Serendipity Studio I knew it was time to finally make my dress.

I have made the full length version of the dress with a ruffled hem band, contrast neckline and waistband. 

Contrast Neckband


The contrast neckband in the pattern has a seam down the centre of it but I thought it would look better without the seam. To make this change simply cut the seam allowance off the centre seam of the Front Contrast Trim pattern piece and cut it on the fold. It is then attached to the dress as per the pattern instructions.

Pockets


I have added inseam side pockets to the dress as per my pocket tutorial here. If you are going to add pockets make sure you fit the bodice before you attach the skirt otherwise it is a real pain to unpick the skirt and take in the side seams. If you aren't including pockets you can do your final fit after the skirt is attached and the zipper has been inserted. The dress is constructed in such a way that you can just sew down the side seam to take in the dress if it is a bit too loose.

Bottom Ruffle
I wanted a fuller ruffle than the one specified in the pattern so I have cut 3 strips of fabric instead of the 2 specified in the pattern instructions.


Apart from what I have mentioned here I did have to make a few other adjustments to the bodice but I will have to save that blog post for a later date. Gotta go and do a bit more prep for the Stitches and Craft Fair now.
- Ky

Wednesday, July 3, 2013

Hummingbird Skirt Sew Along - Part 3

I did manage to finish my Hummingbird skirt last week, I've just been a little bit lax with telling the world about it :P


So after my last post I spent the day looking at the skirt and finally decided that it needed contrast topstitching. I unpicked the front seams just enough so that I could go back and topstitch the pocket and then the front seams. This is why it takes me so long to sew anything. I tend to make and unmake it at least once.

After inserting the invisible zipper in the back seam it was time to baste up the side seams and do a fitting. At this point I realised that you shouldn't trace off a pattern using your measurements from memory. I'm actually an inch smaller around my waist and 1/2 inch smaller around my hips than I thought. I still would have had to trace off the 40" pattern but I would have taken the back waist and dart in to a 29" waist instead of the 30" that I used. 

Luckily this pattern seems to be quite forgiving for large adjustments on the side seams. I think I took in the waist at least 2cm on each side and the hips 1.5cm. Once the fit was sorted I pressed the side seams towards the back of the skirt and topstitched in contrast thread.


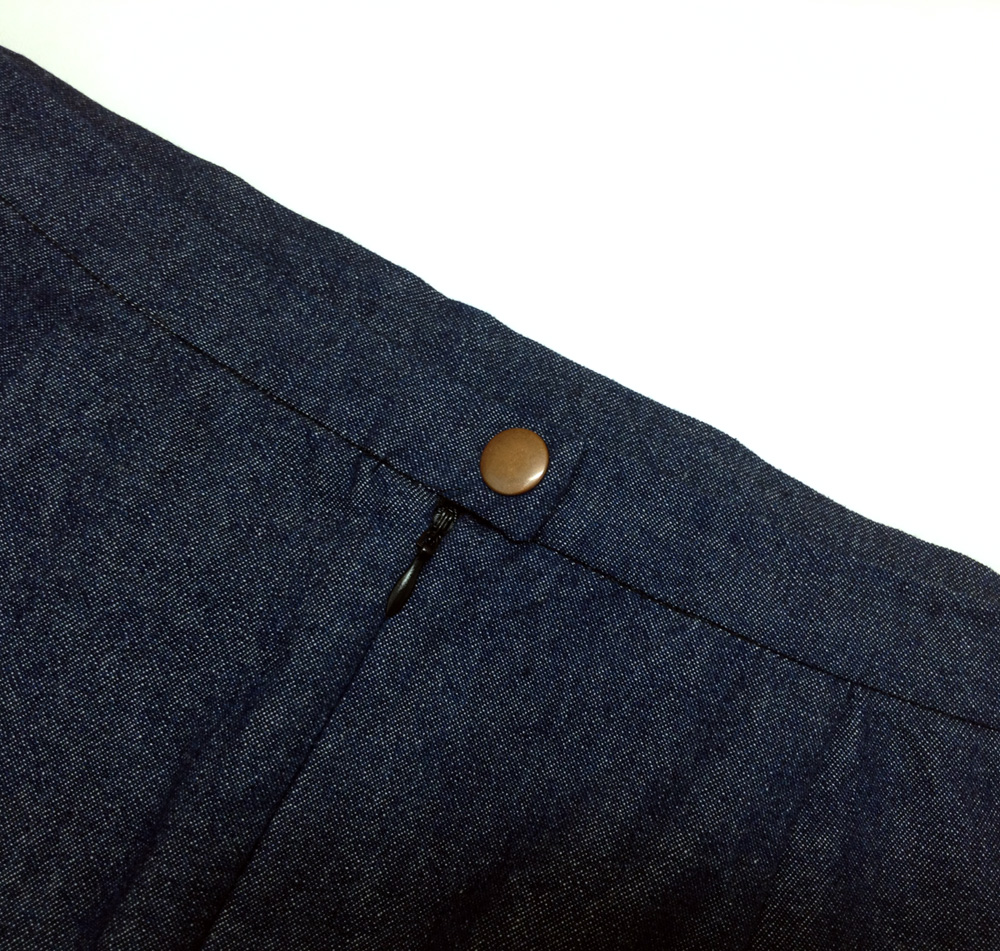
The back has an invisible zipper and I chose a metal press stud for the waistband closure to keep in with the denim theme.

The hem length before I took it up sat around my knees and made me look very frumpy. I folded it up 10cm but it looked way too slutty. This is a 5cm hem which is just right :)

Overall I'm quite pleased with how this skirt turned out, it didn't take too long and required very little fitting.

Previous posts on this skirt can be found here:
Hummingbird Skirt Sew Along - Part 2

-Ky

Wednesday, June 26, 2013

Hummingbird Skirt Sew Along - Part 2

I managed to get in an hour of sewing this morning before work and have completed the front of the Hummingbird skirt. It would have taken less time except for a little mishap where I didn't read the pattern properly and attached the pocket bags to the upper side front the wrong way around. I didn't realise until I had sewn, overlocked and under-stitched both sides, doh.

I'd guess that I wasted 15-20mins with my little reverse sewing endeavour, but these things happen when you are trying to sew within 1/2hr of waking up :)

So far I think that the skirt is coming along nicely, and I am quite happy with the finish. Some top-stitching in a contrasting thread might have been a nice touch but I don't really have the time for added detail on this version.

HummingbirdFront
Pocket bags and side fronts attached.

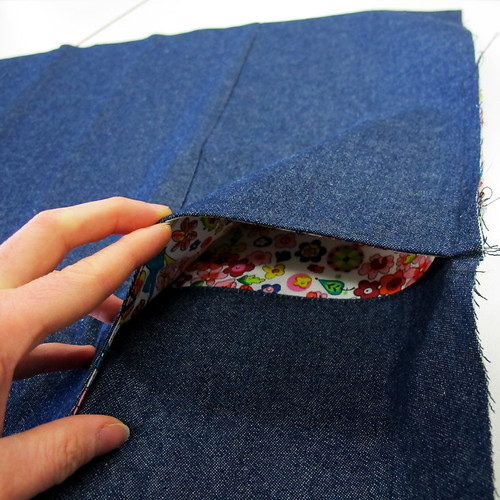
HummingbirdPocketDetail
Sneak peek of the inside of the pockets from the outside.

Hopefully tonight or tomorrow morning I will be able to get the back zipper in then we're on the homeward stretch. 

Other posts on this skirt can be found here:
Hummingbird Skirt Sew Along - Part 3

- Ky

Tuesday, June 25, 2013

Hummingbird Skirt Sew Along - Part 1

This week I am attempting to join in on the sewingcake.com Hummingbird skirt 30min a day sew along.

First up I would like to say how impressed I am with the presentation of the pattern itself. The printing is extremely professional and I like the slightly thicker paper that Cake patterns are now being printed on.


I have a 6oz denim that I am going to use to make the skirt and the pocket bags will be made out of Lupe by Alexander Henry. I really like how well to two fabrics go together.


I have traced my pattern onto a product called Trace n Toile. My hips are 100cm and my waist is 74cm so I am using the 40" hip sizing with a 30" waist. I always find myself getting quite excited about starting a new Cake pattern, the sizing method is quite unique and it almost feels like you are drafting up a custom pattern. Very different to one of the big pattern company patterns which you know are going require a lot of fitting if you aren't a stock size.


Hopefully by tomorrow I will have some sewing completed to show you all :0)

Other posts on this skirt can be found here:
Hummingbird Skirt Sew Along - Part 2
Hummingbird Skirt Sew Along - Part 3

- Kylie