Showing posts with label craft. Show all posts

Saturday, December 13, 2014

My Creative Space...

This week we are starting preparations for the Kustom Kraft market on May 23rd. It will only be the third market that we have done and we thought that it was time to spruce up the stall a bit.

First up some red and black felt bunting for along the front of the table.

Ironing bias binding, the epitome of excitement and burnt fingers

Pinned up and ready for sewing

Even though we predominantly sell fabric and buttons at our stall it is always nice to round things out with a few handmade items.

Some Voodoo Rabbit skins ready for Cloud to put together this weekend
(told you I would be cracking the whip)

Don't forget to check out Kirsty's blog for some more creative spaces.

Ky

Thursday, May 5, 2011

My Creative Space

I made a cushion cover for my mother-in-law for Mother's Day. It uses a crazy patchwork quilt as you go technique on the front which is a great way to use up larger sized fabric scraps.

Front made from fabric scraps of Ephemeral Antiquity, Send in the Crowns and Quatrefoils by Michael Miller.
As well as Leathergrain by Windham Fabrics

Back made from Leathergrain by Windham Fabrics


For more creative spaces pop over to Kootoyoo.

- Ky

Wednesday, May 4, 2011

Toy Making Workshop - May 14th 2011

Calling all Brisbane Bunnies!

Voodoo Rabbit, in conjunction with Pauline from Funky Friends Factory and Linda from Urban Sewing Lounge, will be running our very first toymaking workshop. During the class you will learn basic toy making techniques while making a Plattie Platypus. We will be offering this first workshop at a special discounted rate of $25 + Kit Cost.

There are only 6 spots available so contact us at sales@voodoorabbit.com.au before May 10th if you wish to attend the workshop.


Where: Urban Sewing Lounge, 5 Longlands Street, East Brisbane

Date: Saturday 14th May 2011

Time: 12 - 4pm

Cost:
Workshop - $25 ($15 discount)
Kit - $17.50 (includes pattern, fabric and recycled PET Toy Fill)

Requirements:
Students must have basic sewing experience on a sewing machine.
Sewing machine hire is available for $5.00 (limited number of machines available) otherwise you will have to bring your own machine.

We are very excited to be running our first workshop and hope it is the start of many more to come:)

- Ky and Cloud

Friday, April 29, 2011

Sewing Patterns

Hello crafty bunnies. I just wanted to let you all know that we have started a pattern archive on our blog.

If you click on the pattern link above you will go to our pattern page where we will be listing all of the free Voodoo Rabbit patterns we have made as well as links to a number of cool patterns we've found around the internets.

Here is the latest addition, cute bird wing costume for a child...

Bird Wings by Llevo el invierno
...found via Meet Me At Mikes. A great way to use up some fabric scraps.

There are also 3 patterns developed by Voodoo Rabbit available as well.

Happy Sewing
- Ky

Tuesday, April 26, 2011

BiTM this Friday...


If you haven't got any plans for Friday night then pop on down to King George sqaure and visit the Brisbane Indie Twilight Markets (BiTM). Voodoo Rabbit will be there and as an extra incentive we will be sharing a stall with Pauline from Funky Friends Factory!


Pauline will have a bunch of her awesome Funky Friends patterns and kits and we will have Original Design Voodoo Rabbit fabric, dyed buttons and a selection of handmade items.

Where: King George Square (in front of city hall)
When: 5 - 9pm Friday 29th April 2011

- Ky

Friday, April 15, 2011

April Market Update

A quick update to let you know that you can find Voodoo Rabbit at the following market/s.

Marky Markets 

When:
Sunday 17th April, 11am - 5pm

Where:
The Hi-Fi Bar, 125 Boundary St, West End

BrisStyle Indie Twilight Market (BiTM)


When:
Friday 29th April, 5pm - 9pm

Where:
King George Square, Brisbane City

Thursday, April 7, 2011

My Creative Space

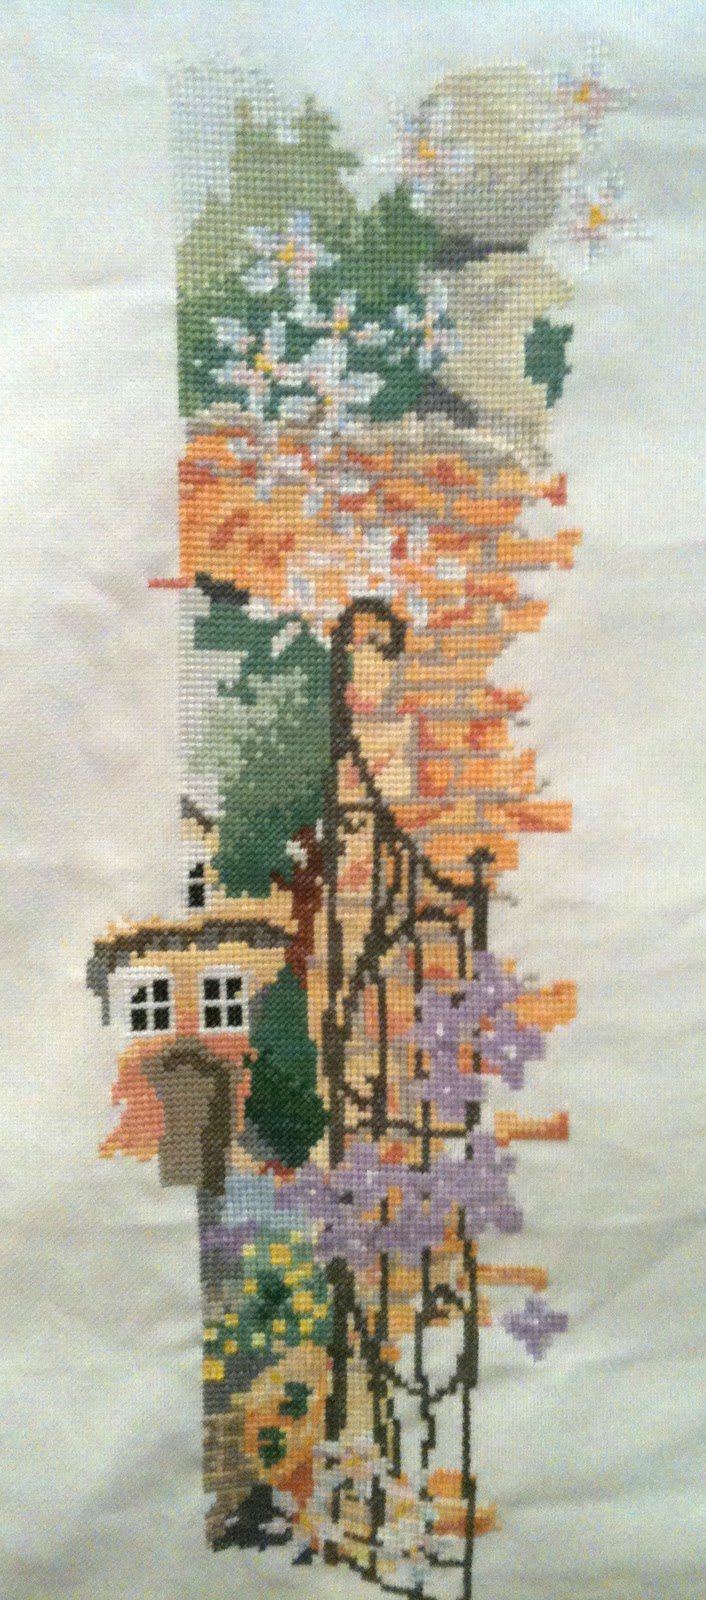
I started this cross stitch a few years ago now, last year my New Years resolution was to finish it, I failed.

I have had a renewed interest in cross stitch so I have a new goal of finishing this by October so I can go to the Quilting and Craft show and buy the second one in the set.
Here is a bit of an overview of my progress to date (please excuse the dodgy photo quality).

 Progress as of this week (almost 3/4 of the way through the cross stitching. YAY).


Progress as of the start of 2011

Progress at the start of 2010 year (look at how un-wrinkled the fabric is)

I'll try to post another update in a month or so. 

In other news Cloud is learning to knit, photo evidence to come sometime in the next few weeks:)

For more creative spaces head over here.

- Ky


Friday, March 11, 2011

March Market

This month you will find Voodoo Rabbit at the 9th Annual Logan Tattoo and Art Exhibition on the Saturday the 19th March. The exhibition will be held at the Acacia Ridge Hotel, 1386 Beaudesert Rd Acacia Ridge.

We will have a selection of fabric from Alexander Henry, Michael Miller, Kokka, Lecien, Voodoo Rabbit originals and more. We will also have a number of handmade toys, bags, badges and hand dyed buttons.


Don't forget that you can also find us every week at Coorparoo Market, Upper Level, Cnr Old Cleveland Rd and Cavendish Rd, Coorparoo, Brisbane. Thursday - Sunday from 7am to 3pm.

- Ky

Thursday, March 3, 2011

My Creative Space

This cute little bunny was a custom order for a little baby boy.
Long Eared Bunny - Front

He is based on Funky Friends Factory Baby Bunny pattern but he has extra long ears.
Long Eared Bunny - Back
The fabric is our very own Bunny Goth Scatter in blue.

Pop over to Kootoyoo for more Creative Spaces.

- Ky

Thursday, December 23, 2010

My Creative Space

This week we had a custom order to make up, the customer wanted a set of 6 placemats and a table runner as a gift for her Aunt and Uncle.

Custom Order Set 01
She chose Ephemeral Antiquity Plum by Michael Miller for the top and Quatrefoils Plum by Michale Millerfor the back. We used bamboo batting in between the two layers of fabric and all three layers have been lightly quilted together. The table runner measures 130 x 30cm and the placemats are 21 x 30cm.

Custom Order Detail 02
The backing fabric wraps around to the front to form the binding.

Custom Order Coasters
There was some batting and fabric left so we made up a set of coasters as well, each one features a different design from the fabric.

- Ky

Thursday, December 16, 2010

My Creative Space

We ordered some more Funky Friends Factory patterns since they are just so cute.  Here is the latest sample and our favourite so far. Introducing Geeky Chook, once he was stuffed we decided that he looked so geeky that he needed a pair of glasses.

Funky Friends Factory Cheeky Chook Sample 03
Cloud did all of the sewing on this one and made the little glasses, I just sewed up the stuffing hole, and did the hand sewing on his wings and attached the eyes and glasses.

Funky Friends Factory Cheeky Chook Sample 01
The pattern is called Cheeky Chook by Funky Friends Factory. The fabric used was our very own Gingham Invaded for the body. Red homespun cotton for the comb, giblets and feet. Early Bird Yellow Crosshatch by Cosmo Cricket for the beak.

This is a fairly easy patterns to sew together, probably on a similar level to Stu the Sea Turtle.

We now stock 10 Funky Friends Factory patterns in our Coorparoo Market store, new patterns are Mitch the Monkey, Patty the Cow, Cheeky Chook and Silly scrap snake. Samples of the rest to come;)

In other creative pursuits I have also managed to cut out two dresses for myself, hopefully I will be able to sew them together before the start of the new year.

- Ky

Thursday, December 2, 2010

My Creative Space

This week we have managed to make one more Funky Friends Factory toy, introducing Plattie the Platypus.

Funky Friends Factory Plattie Sample 01

He is made up using Daisy Doogle Lime by Michael Miller for the body and Adventures in Wonderland Faux Leathergrain by Winham fabrics for his bill and feet. This is a very simple pattern that goes together fairly quickly and easily.

Funky Friends Factory Plattie Sample 02

His bill got a little squished in my bag on the way to the shop, poor little Plattie.

We are halfway through the Larry the Lion plushie mentioned in last Fridays post, hopefully he will be finished in the next day or so.

Join in the last creative space of the year with Kirsty over at Kootoyoo.

- Ky

Thursday, November 18, 2010

My Creative Space

Lots of sewing has actually been happening here at Voodoo Rabbit : )  This week we have been making up samples of some new Funky Friends Factory patterns that we are stocking in our Coorparoo Store. All of these patterns are designed by the very talented Pauline, a Brisbane local.

Funky Friends Factory Sea Turtle Sample 02
Stu the Sea Turtle
- Shellburne Circus Wheels Black by Windham (shell and beak)
- Shellburne Circus Flags Black by Windham (head and flippers)
- Ta Dot Black by Michael Miller (tummy and sides)
We found that this pattern went together quite easily, the trickiest bit is sewing the curves but as long as you go along slowly it isn't too hard. We used 3 fabrics but he could easily be made up in just two if you make his tummy out of the same fabric as the shell and his sides out of the same fabric as the head.

Funky Friends Factory Hippo Sample 03
Heather Hippo
- Apple Dot Autum by Sandi Henderson for Micheal Miller (main body)
- Early Bird Yellow Crosshatch by Cosmo Cricket for Andover Fabrics (tummy, ears and feet)
This pattern was a bit trickier, as soon as you introduce gussets, foot pads and snouts the difficulty level increases. The result in well worth the effort though.

Funky Friends Factory Frog Sample 02
Prince Charming
- Send in the Crowns Plum by Micheal Miller (main body)
- Small Leaves Black by STOF (tummy)
This is probably the easiest of the 4 patterns so far. There are only 2 main pattern pieces plus the eyes and crown. Once again as long as you sew slowly around the curves you shouldn't run into too many problems. The pattern suggests using plastic pallets in the feet but we found that this didn't look very good since we used cotton fabric (would be fine in fleece) so we have just used poly fill.

Funky Friends Factory Aardvark Sample 02
Artie Aardvark
- Early Bird Geometric Floral by Cosmo Cricket for Andover Fabrics (main body)
- Early Bird Yellow Crosshatch by Cosmo Cricket for Andover Fabrics (tummy, ears and feet)
The aardvark would be on par with the hippo in regards to difficulty level, the snout is a bit trickier and we recommend sewing it in by hand as there just isn't enough space to get you machine in.

We still have a platypus and lion pattern to make samples up so stay tuned. I have also just found a tutorial on Pauline's blog on how to sew in the perfect foot pads, which I will be following dilegently next time I need to sew a footpad in.

For more Creative Spaces head over to Kirsty's.

- Ky

Friday, November 12, 2010

Spotlight - Hippie House Dolls

Here are some adorable dolls made by the very talented Kylie of Hippie House Dolls featuring fabric she purchased from us. Kylie creates Premium Handmade Waldorf Dolls made with natural materials. Both of these cuties are custom orders and come with two outfits.

Skully (aren't her shoes cute)

and in her funky pants

Custom Order - Super Mason

Every super hero needs a cape.

Watch out he also know karate.

- Ky

Friday, October 8, 2010

Spoonflower Fabric of the Week: Vampires

A new fabric design for this weeks fabric of the week comp at Spoonflower. This is the first in what we hope will be a series of toys based on Squee Bunny. The title of the series is Dress up With Squee and this is Count Squeecular. Each toy is printed on a fat quarter and all you have to do is cut, sew and stuff.


We are please as punch over how he turned out and are eagaly awaiting our test fabric to arrive.

What do you think?

If you would like to vote for Squee head over to the voting page at Spoonflower. The designs appear in a different order for each person who votes in the contest.

Vote by clicking on the images of Count Squeecular. It is called Dress Up With Squee - Count Squeecular by voodoorabbit. A green box will appear around the design you select for voting. Your vote is submitted only after you reach the end of the voting pages and click the button to submit your vote.

- Ky

Thursday, September 30, 2010

My Creative Space

We didn't have a market this weekend so I got my creative on! It has been a while. Too long in fact. I bought a the third of the 'Softies' books recently - Simple Softies - which is chock full of patterns for toys that can be made without a sewing machine.

I got the book mainly so I could make the Sampler Kitty. Here's mine:

He has the sweetest little face! This was done with Satin Stitch and Chain Stitch.

To embellish him, I used a scrap of our Gingham Invaded Black on White & handstitched a sampler of different stitches. From the top:

Whipped Whipped Stitch (I think that is what it is called)
Single Feather Stitch
Cross Stitch (to hold down the Gingham Invaded fabric)
Raised Stem Stitch
Arrowhead Stitch
Running Stitch

He was assembled with Whip Stitch.

Kitty sits on my window sill at work and makes me smile during the day. He's so squishable & cute!


Head over to Kirsty's blog to see what other people have been doing this week :)

- Cloud

Wednesday, September 29, 2010

Free Grug Pattern

Jan 2010 - Show and Tell 06
Some of you may remember that earlier this year I blogged about this awesome Grug toy that Sue (a fellow ASG member) made for one of her grandchildren. Sue very kindly supplied me with the rough working pattern that she created to make Grug. Since then I have been faffing around trying to write up some instructions and create diagrams so that we can share this pattern with you all.

The pattern can be downloaded from here.

Before you jump in to make a Grug of your very own here are a few disclaimers:
  • Grug is a copyrighted character so you cannot sell the complete toy or the pattern.
  • The instructions (pages 1 - 4) are on A4 size pages and the pattern pieces (pages 5 - 7) are on A3 size pages.
  • The difficulty level of this pattern would be for an intermediate to experienced sewer. I have made some assumptions of knowledge when writing the instructions.
  • I have not personally tested this pattern (I hate using furry fabrics) so if someone would like to volunteer to pattern test it would be greatly appreciated.
  • If you encounter any errors please let me know and I will update the pattern.
  • Grug is just over 30cm tall when completed.
- Ky

Thursday, September 9, 2010

My Creative Space

Finally some creating has been happening here, I cleaned my sewing room so I think that has helped.


Another fifties baby bib, this on is a sample to show off the iron on vinyl we now stock. Also I thought this fabric was appropriate for the style. Just a tip, if you decide to use the iron on vinyl, make sure that you remove all of the creases in the fabric prior to applying the vinyl otherwise you have the creases for life:)

Signs for the markets so people can tell that we sell fabric.

Cargo pants for Polymonkey, they are taking forever as they have all of the pockets and each seam is sewn at least three times.

Check out more creative spaces with Kristy at Kootoyoo.

-Ky

Thursday, August 26, 2010

My Creative Space

Last week another of my friends had a baby boy, so in typical fashion I had to rush and make up a present for the baby. You would think that 9 months would be enough warning but no I have to wait until the baby is born to get my act together.
I found this awesome "FABULOUS FIFTIES" Bib pattern at Nicole Mallalieu Design it is a bit different to your standard baby bib and I really like the retro styling.

Pipi's Kitchen Bib - BackTop

Pipi's Kitchen Bib - Front

For the main fabric I used Pipi's Kitchen by Kokka, it is cute enough to be a baby fabric and the colouring could be used for either a boy or a girl. For the lining I used a plain white cotton and made the binding from a plain red cotton. At 25mm the binding is slightly wider than the 18mm one specified on the pattern but I don't think it makes too much of a difference. Once again I used my nifty bias binding foot to apply the binding, the curves were a little tricky but with only a small amount of unpicking I got the binding on fairly evenly. Over all this is a very simple pattern to put together and didn't take too long to sew, the most time consuming part was making up the bias binding.

What have you been creating this week, head over to Kootoyoo to see more creative spaces.

Wednesday, July 28, 2010

My Creative Space

We've been busy little bunnies this week preparing for the markets we will be attending during August.

Display Canvas 01

We wanted a nice way of displaying some of our fabrics so we stretched them over painting canvases so we can hang them up. Cloud managed to not staple gun her fingers so we count this as a huge success.

Bunny Squee Giant 01

Cloud finally sewed together the first Giant felt Squee Bunny. That's my hand holding him to give you an idea of the scale.

Bunting Playing Card

I made some awesome Felt Playing Card Bunting (for sale not for our stall). There are also lots of Mini Squee Bunnies to sew together after last week's monster cutting out session that I did.

Lots of work goes into having a stall at a market but we love meeting our customers so it's worth it.

Head over to Kootoyou to see some more fabulous Creative Spaces.

Ky