
So of course when my little sister announced that she was getting married and finally decided upon a date I offered to do the invitations. Luckily my little sister is fairly easy to design for, I came up with a few ideas and she picked the one below. The rose design is inspired by the Cross stitch design from her wedding guest book (read more about the guest book here). I saw an invitation design somewhere on a website that had a printed wax seal, so I decided we were going to go one better and use a real wax seal.
All of the stationary was printed double-sided on 200gsm Ivory canson card stock using an A3 Epson printer, my two sisters then had to cut them all out, attach the ribbon and wax seal. I was slightly worried that they were going to set fire to my kitchen but all the wax was melted without mishap.
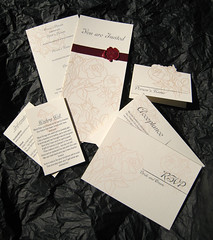
The full Stationary set included the invitations, RSVP card, Info/wishing well card and a place card.
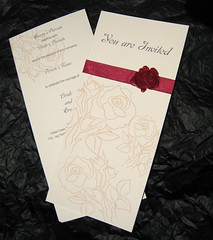
The invitations are DL size with a piece of 12mm ribbon and a wax seal on the front.
The invitations are DL size with a piece of 12mm ribbon and a wax seal on the front.
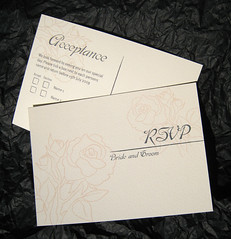
Each RSVP card included a stamp and the name of the invited persons so that when the cards were returned there was no chance of them not having any names on them. We had heard stories of people who had RSVP cards with space for people to write their names on and the cards being returned with no names added so that the bride had no idea of who it was from.
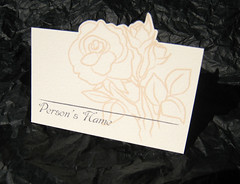
I had to cut out the place cards all by hand, luckily I am pretty quick with a scalpel.
All of the stamps used on the envelopes and the RSVP cards featured roses and were from the Australia Post "With Love" range. 
No comments:
Post a Comment